Difference between revisions of "MultiCharts Work Area"
(Created page with " Category:MultiCharts") |
|||
| Line 1: | Line 1: | ||
| + | The application window consists of Toolbars, Workspaces, and Windows (Chart or/and Scanner). | ||
| + | |||
| + | For detailed information about Windows, | ||
| + | [[<span style="color: red;">'''LINK'''</span> /21-0100_MCWorkArea.html name="2"; ||click here]]. | ||
| + | |||
| + | == Understanding Workspaces == | ||
| + | |||
| + | Workspaces help manage the working process. Several Workspaces can be open at the same time. It is possible to create, save, open, close, rename, and delete Workspaces, as well as to switch between Workspaces that are open in the application window. Each Workspace can contain multiple windows. | ||
| + | |||
| + | Names of all open Workspaces are shown in the tabs at the bottom of application window. The tab of the currently selected (active) Workspace is highlighted. To switch to another open Workspace click the tab of the Workspace you wish to switch to. | ||
| + | |||
| + | To achieve peak performance limit the number of simultaneously open workspaces to the ones you actually need. | ||
| + | |||
| + | === Creating Workspaces === | ||
| + | To create a new Workspace, click the '''New Workspace''' http://www.multicharts.com/img/wiki/toolbar/01_Create_New_Workspace.png" WIDTH="23" HEIGHT="20" HSPACE="2"ALIGN="bottom"> icon on the '''Main''' toolbar. | ||
| + | |||
| + | Workspaces can also be created by using the '''Ctrl + N''' hot key, or by selecting '''File''' in the main menu, then pointing to '''New''' and clicking '''New Workspace'''. | ||
| + | |||
| + | <div style="background-color: #E3FBE5;">Note: If there are no open Workspaces when a new Chart Window is created, a new Workspace for that window will be created automatically.</div> | ||
| + | |||
| + | === Saving Workspaces === | ||
| + | A Workspace, complete with Chart/Scanner Windows and all settings, is saved as a file with '''.wsp''' extension. | ||
| + | |||
| + | To save a Workspace, click the '''Save Workspace''' http://www.multicharts.com/img/wiki/toolbar/03_Save_Workspace.png" WIDTH="23" HEIGHT="20" HSPACE="2"ALIGN="bottom"> icon on the '''Main''' toolbar. | ||
| + | Workspaces can also be saved by using the '''Ctrl + S''' hot key, or by selecting '''File''' in the main menu and clicking '''Save Workspace'''. | ||
| + | |||
| + | If the Workspace has not yet been named, the '''Save As''' dialog box will appear, allowing to choose a file name for the workspace. | ||
| + | |||
| + | In order to save an already named Workspace under a new name, select '''File''' in the main menu and | ||
| + | click '''Save Workspace As'''. | ||
| + | |||
| + | To save Workspaces automatically on application | ||
| + | exit, see [[<span style="color: red;">'''LINK'''</span> /21-0100_MCWorkArea.html name="1=17"; ||Workspaces Preferences]]. | ||
| + | |||
| + | === Opening Workspaces === | ||
| + | Saved Workspaces can be opened by using Windows Explorer/File manager as well as from the application. | ||
| + | |||
| + | To open a Workspace from the application, click the '''Open Workspace''' http://www.multicharts.com/img/wiki/toolbar/02_Open_Workspace.png" WIDTH="23" HEIGHT="20" HSPACE="2"ALIGN="bottom"> icon on the Main toolbar; in the '''Open''' dialog box that appears, navigate to and select the Workspace file ('''.wsp''' extension) and click the '''Open''' button. | ||
| + | Workspaces can also be opened by using the '''Ctrl + O''' hot key, or by selecting '''File''' in the main menu and clicking '''Open Workspace'''. | ||
| + | |||
| + | Recently used Workspaces can be opened by clicking the down-arrow to the right of the '''Open Workspace''' http://www.multicharts.com/img/wiki/toolbar/02_Open_Workspace.png" WIDTH="23" HEIGHT="20" HSPACE="2"ALIGN="bottom"> icon on the Main toolbar and then clicking a Workspace name, or by selecting '''File''' in the main menu, then pointing to '''Recent Workspaces''' and | ||
| + | clicking a Workspace name. | ||
| + | |||
| + | To open Workspaces automatically on application startup, see [[<span style="color: red;">'''LINK'''</span> /21-0100_MCWorkArea.html name="1=17"; ||Workspaces Preferences]]. | ||
| + | |||
| + | === Closing Workspaces === | ||
| + | To close a Workspace, click the '''Close Workspace''' http://www.multicharts.com/img/wiki/toolbar/04_Close_Workspace.png" WIDTH="23" HEIGHT="20" HSPACE="2"ALIGN="bottom"> icon on the '''Main''' toolbar. | ||
| + | Workspaces can also be closed by using the '''F4''' key, or by selecting '''File''' in the main menu and clicking '''Close Workspace'''. | ||
| + | |||
| + | If any changes have been made to a Workspace since it was last saved, and: '''Do not show "Save Workspace" dialog on Exit''' checkbox | ||
| + | in [[<span style="color: red;">'''LINK'''</span> /21-0100_MCWorkArea.html name="1=17"; ||Workspace | ||
| + | Preferences]] is not selected, the '''Save Workspace''' dialog box will appear: | ||
| + | <br>- click '''Yes''' to save the changes and close the Workspace; | ||
| + | <br>- click '''No''' to discard the changes and close the Workspace; | ||
| + | <br>- click '''Cancel''' to cancel the operation and keep the Workspace open. | ||
| + | |||
| + | To disable the dialog box and close workspaces without confirmation, | ||
| + | see [[<span style="color: red;">'''LINK'''</span> /21-0100_MCWorkArea.html name="1=17"; ||Workspaces Preferences]]. | ||
| + | |||
| + | <br><div style="background-color: #F8F6CD;">Important:</div>If both the '''Do not show "Save Workspace" dialog on Exit''' checkbox | ||
| + | and '''Do not save workspaces''' option are selected in the [[<span style="color: red;">'''LINK'''</span> /21-0100_MCWorkArea.html name="1=17"; ||Workspace]] tab | ||
| + | of the '''Preferences''' window then no changes to the workspace will be saved on exit!</div> | ||
| + | <br> | ||
| + | |||
| + | === Renaming Workspaces === | ||
| + | Workspaces can be renamed by two different methods: | ||
| + | |||
| + | * Save a copy of the Workspace under a different name. See [[<span style="color: red;">'''LINK'''</span> /21-0100_MCWorkArea.html name="1=12"; ||Saving Workspaces]]; or: | ||
| + | * Use Windows Explorer or another program to rename a Workspace file as any other Windows file. | ||
| + | |||
| + | <br><div style="background-color: #E3FBE5;">Note: Workspaces that are open cannot be renamed by Windows Explorer. Close the Workspace prior to renaming it.</div> | ||
| + | |||
| + | === Deleting Workspaces === | ||
| + | |||
| + | Use Windows Explorer or another program to delete the Workspace file as you would any other Windows file. Deleting a Workspace does not delete the data or the studies. | ||
| + | |||
| + | <div style="background-color: #E3FBE5;">Note: A Workspace that is open cannot be deleted. Close the Workspace prior to deleting it.</div> | ||
| + | |||
| + | |||
| + | === Workspaces Preferences === | ||
| + | Workspaces preferences settings determine which workspaces, if any, will be opened on application startup, whether changes to workspaces will be saved on application exit, and if a confirmation prompt will appear when Chart/Scanner Windows are closed. | ||
| + | |||
| + | To set workspace preferences: | ||
| + | |||
| + | # Open the '''Preferences''' window by selecting '''File''' in the main menu and then clicking '''Preferences'''; the window can also be opened by using ALT+F, ALT+F keyboard shortcut sequence. | ||
| + | # Select the '''Workspaces''' tab. | ||
| + | # To open Workspaces on startup, select the '''Open Workspaces on Start''' checkbox; clear the checkbox to not open any Workspaces on startup. | ||
| + | # To show the '''Workspaces''' dialog box on startup, select the '''Show the dialog''' checkbox; clear the checkbox to not display the dialog box. | ||
| + | # Select the Workspaces to be opened on startup. | ||
| + | # To show '''Save Workspace''' dialog box on exit, clear the '''Do not show "Save Workspace" dialog on Exit''' checkbox; select the checkbox to not display the dialog box. | ||
| + | # Select '''Save workspaces''' or '''Do not save workspaces''' to save or not to save the workspaces on exit, respectively. | ||
| + | # To prompt for a confirmation when a Chart/Scanner Window is closed (deleted), clear the '''Do not prompt for confirmation when I want to close a window''' checkbox; check the checkbox to prompt for a confirmation when a window is closed. | ||
| + | |||
| + | == Understanding Windows (Chart/Scanner) == | ||
| + | |||
| + | Chart Windows contain charts, studies, and drawings. The number of windows that can be added to Workspaces is limited only by your computer's hardware configuration. | ||
| + | |||
| + | In Workspaces with multiple windows only one window at a time is active. The active window is the window to which any changes will be applied, and is distinguished by the color of its title bar. Any one of the windows in a Workspace can be selected as the active at any time. | ||
| + | |||
| + | Windows can be moved within a workspace or detached and positioned anywhere on your computer’s desktop, arranged in any order, resized, maximized, minimized, and closed. Closing a window deletes it from the Workspace. | ||
| + | |||
| + | Windows are saved only as a part of the Workspace that contains them. | ||
| + | |||
| + | === Creating Windows === | ||
| + | |||
| + | A Chart Window is always created at the same time as the chart/grid that is placed in it. It is not possible to create an empty window, without a chart/grid. A Chart/Scanner Window is always created in the currently selected Workspace. | ||
| + | |||
| + | To read more about creating charts [[<span style="color: red;">'''LINK'''</span> /22-0100_CreatingChart.html name=""; ||click here]] | ||
| + | |||
| + | To read more about Workspaces [[<span style="color: red;">'''LINK'''</span> /21-0100_MCWorkArea.html name="1"; ||click here]] | ||
| + | |||
| + | === Selecting a Window as Active === | ||
| + | Before making changes to a Window you should make sure that it is active. Only one window at a time can be active. | ||
| + | |||
| + | A Window can be selected as active by one of the following methods: | ||
| + | |||
| + | * Click anywhere on the window to make it active; or: | ||
| + | * Select '''Window''' in the main menu and click the name of the window. | ||
| + | |||
| + | <br>Color change of the window's title bar will indicate that the window has become active. | ||
| + | |||
| + | === Detaching and Attaching Windows === | ||
| + | |||
| + | By default, Windows are displayed within a Workspace. Windows can be detached from a Workspace and | ||
| + | positioned anywhere on your computer's desktop; on a multiple-monitor system, one or more Windows can be displayed on each monitor. | ||
| + | |||
| + | A Window can be detached by one of the following methods: | ||
| + | |||
| + | * Click the '''Detach Window''' http://www.multicharts.com/img/wiki/window/Detach.gif" WIDTH="35" HEIGHT="17" HSPACE="2" ALIGN="bottom"> button | ||
| + | on the title bar of the window; | ||
| + | |||
| + | or: | ||
| + | |||
| + | * Select '''Window''' in the main menu and click '''Detach Window'''. | ||
| + | |||
| + | <div style="background-color: #E3FBE5;">Note: Detached windows' last chosen positions are retained the next time that the application is started</div> | ||
| + | |||
| + | A Window can be attached back to the Workspace by one of the following methods: | ||
| + | |||
| + | * Click the '''Attach Window''' http://www.multicharts.com/img/wiki/window/Attach.gif" WIDTH="35" HEIGHT="17" HSPACE="2" ALIGN="bottom"> button | ||
| + | on the title bar of the window; | ||
| + | |||
| + | or: | ||
| + | |||
| + | * Select '''Window''' in the main menu and click '''Attach Window'''. | ||
| + | |||
| + | === Detached Windows "Always on Top" Feature === | ||
| + | To keep a detached Window displayed always on top of other windows click | ||
| + | the '''Stick''' http://www.multicharts.com/img/wiki/window/Stick.gif" WIDTH="35" HEIGHT="17" HSPACE="2" ALIGN="bottom"> button | ||
| + | on the title bar of the window; the button will change | ||
| + | to http://www.multicharts.com/img/wiki/window/UnStick.gif" WIDTH="35" HEIGHT="17" HSPACE="2" ALIGN="bottom">. | ||
| + | |||
| + | To cancel the feature click | ||
| + | the '''Unstick''' http://www.multicharts.com/img/wiki/window/UnStick.gif" WIDTH="35" HEIGHT="17" HSPACE="2" ALIGN="bottom"> button | ||
| + | again; the button will change to http://www.multicharts.com/img/wiki/window/Stick.gif" WIDTH="35" HEIGHT="17" HSPACE="2" ALIGN="bottom">. | ||
| + | |||
| + | <br><div style="background-color: #E3FBE5;">Note: Detached window's last chosen Always on Top status is retained the next time that the application is started.</div> | ||
| + | |||
| + | === Arranging Windows === | ||
| + | It is possible to arrange windows in any order. A Window can be positioned anywhere by placing the mouse pointer over the window’s title bar, holding the left mouse button, and dragging the window to the desired position. | ||
| + | Windows within a workspace can also be arranged automatically: | ||
| + | |||
| + | * To arrange all open windows for convenient viewing select '''Window''' in the main menu and click '''Arrange All''' any minimized windows will be placed at the bottom of the Workspace, below any open windows. | ||
| + | * To arrange all windows horizontally or vertically select '''Window''' in the main menu and click '''Arrange Horizontally''' or '''Arrange Vertically''', respectively. | ||
| + | * To arrange all open windows in a cascade select '''Window''' in the main menu and click '''Cascade'''; any minimized windows will be placed at the bottom of the Workspace, below any open windows. | ||
| + | |||
| + | <br><div style="background-color: #E3FBE5;">Note: Windows' last chosen positions are retained the next time that the application is started.</div> | ||
| + | |||
| + | === Deleting Windows === | ||
| + | A window can be deleted from a Workspace. To close a Window means to delete it. It is possible to delete all of the windows from a Workspace, leaving the Workspace empty. | ||
| + | |||
| + | To delete a Window from a Workspace click the '''Close''' button on the title bar of the window; in the dialog box that appears, click '''Yes''' to delete the window, or click '''Cancel''' to cancel the operation and keep the window open. | ||
| + | |||
| + | To disable the dialog box and delete windows without confirmation, see [[<span style="color: red;">'''LINK'''</span> /21-0100_MCWorkArea.html name="1=17"; ||Workspaces Preferences]]. | ||
| + | |||
| + | === Switching between Windows === | ||
| + | |||
| + | Within a Workspace you can switch between the open windows by using the '''Ctrl + F6''' hotkey combination, or by clicking anywhere on the window you wish to switch to. | ||
| + | |||
| + | === Copying Windows === | ||
| + | The active Chart/Scanner Window can be copied, complete with all settings, data series, | ||
| + | and studies, and pasted to any open Workspace. | ||
| + | |||
| + | To copy an active window use one of the following methods: | ||
| + | |||
| + | * Select '''File''' in the main menu and click '''Copy Window'''; or: | ||
| + | * Use CTRL+SHIFT+C hot key combination. | ||
| + | |||
| + | To paste the copied Window: | ||
| + | |||
| + | * Select '''File''' in the main menu and click '''Paste Window''', or: | ||
| + | * Use '''Ctrl + Shift + V''' hot key combination. | ||
| + | <br> | ||
| + | |||
| + | == Understanding Toolbars == | ||
| + | |||
| + | '''Toolbars''' provide convenient access to commonly used functions. These functions can also be accessed by using the menus, but the toolbars let you do it with just one click. | ||
| + | |||
| + | There are six toolbars: Chart Analysis, Command Line, Control, Drawing, Main, and Resolution. Any of the toolbars can be made floating, allowing them to be positioned anywhere, or hidden if they are not needed. | ||
| + | |||
| + | === Hiding and Redisplaying Toolbars === | ||
| + | All toolbars are displayed by default. | ||
| + | |||
| + | To hide a toolbar select '''View''' in the main menu, then click '''Toolbars''' and uncheck the toolbar that is to be hidden. | ||
| + | |||
| + | A floating toolbar can also be hidden by clicking the '''Close''' button on the toolbar’s title bar. | ||
| + | |||
| + | To redisplay a toolbar select '''View''' in the main menu, then click Toolbars''' and check the toolbar that is to be displayed. | ||
| + | |||
| + | The Resolution toolbar can also be hidden or redisplayed by clicking the '''Resolution''' http://www.multicharts.com/img/wiki/toolbar/compression/01_Resolution.png" WIDTH="23" HEIGHT="20" HSPACE="2"ALIGN="bottom"> icon. | ||
| + | <br> | ||
| + | |||
| + | |||
| + | === Floating or Docking Toolbars === | ||
| + | By default, toolbars are displayed docked to the top of the application window. Any of the toolbars can be made floating or docked. A floating toolbar has its own title bar and can be positioned anywhere on your computer’s desktop. | ||
| + | |||
| + | Toolbars can be made floating by using one of the following methods: | ||
| + | |||
| + | * Double-click the move handle of a docked toolbar; or: | ||
| + | * Position the mouse pointer over the toolbar's move handle; hold the left mouse button and drag the toolbar to the desired position. | ||
| + | |||
| + | Toolbars can be docked by one of the following methods: | ||
| + | |||
| + | * Double-click the toolbar's title bar. The toolbar will dock along the top border of the application window; or: | ||
| + | * Position the mouse pointer over the title bar of a floating toolbar; hold the left mouse button and drag the toolbar to any of the four borders of the application window. Once the mouse pointer comes close to a border of the window, an outline will indicate where the toolbar will be docked. Releasing the mouse button will dock the toolbar. | ||
| + | |||
| + | <br><div style="background-color: #E3FBE5;">Note: Toolbars' last chosen positions are retained the next time that the application is started.</div> | ||
| + | |||
| + | === Resizing Floating Toolbars === | ||
| + | A floating toolbar can be resized the same way as any other window. | ||
| + | |||
| + | <div style="background-color: #E3FBE5;">Note: Toolbars' last chosen sizes are retained the next time that the application is started.</div> | ||
| + | |||
| + | === Toolbar Icons Reference === | ||
| + | |||
| + | {| | ||
| + | |- | ||
| + | |'''Main Toolbar'''|| || || | ||
| + | |- | ||
| + | |-|'''New Workspace'''||http://www.multicharts.com/img/wiki/toolbar/01_Create_New_Workspace.png||[[<span style="color: red;">'''LINK'''</span> /21-0100_MCWorkArea.html name="1=11"; ||Creating Workspaces]] | ||
| + | |-|'''Save Workspace'''||http://www.multicharts.com/img/wiki/toolbar/02_Open_Workspace.png||[[<span style="color: red;">'''LINK'''</span> /21-0100_MCWorkArea.html name="1=12"; ||Saving Workspace]] | ||
| + | |-|'''Open Workspace'''||http://www.multicharts.com/img/wiki/toolbar/03_Save_Workspace.png||[[<span style="color: red;">'''LINK'''</span> /21-0100_MCWorkArea.html name="1=13"; ||Opening Workspace]] | ||
| + | |-|'''Close Workspace'''||http://www.multicharts.com/img/wiki/toolbar/04_Close_Workspace.png||[[<span style="color: red;">'''LINK'''</span> /21-0100_MCWorkArea.html name="1=14"; ||Closing Workspace]] | ||
| + | |-|'''New Chart Window'''||http://www.multicharts.com/img/wiki/toolbar/05_Create_New_Chart_Window.png||[[<span style="color: red;">'''LINK'''</span> /22-0100_CreatingChart.html name=""; ||Creating Chart]] | ||
| + | |-|'''New Scanner Window'''||http://www.multicharts.com/img/wiki/toolbar/59_Scanner.png||[[<span style="color: red;">'''LINK'''</span> /0298_Scanner/22-9801_UnderstandingScanner.html name=""; || Understanding Real-Time Scanner]] | ||
| + | |-|'''New QuoteManager'''||http://www.multicharts.com/img/wiki/toolbar/56_QuoteManager.png||[[<span style="color: red;">'''LINK'''</span> /100_Understanding_QuoteManager.html name=""; || Understanding QuoteManager]] | ||
| + | |-|'''New PowerLanguage Editor'''||http://www.multicharts.com/img/wiki/toolbar/58_PLEditor.png||[[<span style="color: red;">'''LINK'''</span> /03_PLE/31-0000_Understanding_PLEditor.html name=""; || Understanding PowerLanguage Editor]] | ||
| + | |- | ||
| + | |-|'''Control Toolbar'''|| || || | ||
| + | |- | ||
| + | |-|'''Decrease Bar Spacing'''||http://www.multicharts.com/img/wiki/toolbar/21_Decrease_Bar_Spacing.png||[[<span style="color: red;">'''LINK'''</span> /21-0100_MCWorkArea.html name="2"; ||[[<span style="color: red;">'''LINK'''</span> /22-0400_Navigating_ChartWindow.html name="3=31"; ||Changing Bar Spacing]]]] | ||
| + | |-|'''Increase Bar Spacing'''||http://www.multicharts.com/img/wiki/toolbar/22_Increase_Bar_Spacing.png||[[<span style="color: red;">'''LINK'''</span> /21-0100_MCWorkArea.html name="2"; ||[[<span style="color: red;">'''LINK'''</span> /22-0400_Navigating_ChartWindow.html name="3=31"; ||Changing Bar Spacing]]]] | ||
| + | |-|'''Compress Price Scale'''||http://www.multicharts.com/img/wiki/toolbar/23_Compress.png||[[<span style="color: red;">'''LINK'''</span> /22-0400_Navigating_ChartWindow.html name="3=33"; ||Changing Price Scale Compression]] | ||
| + | |-|'''Expand Price Scale'''||http://www.multicharts.com/img/wiki/toolbar/24_Expand.png||[[<span style="color: red;">'''LINK'''</span> /22-0400_Navigating_ChartWindow.html name="3=33"; ||Changing Price Scale Compression]] | ||
| + | |-|'''Move Up'''||http://www.multicharts.com/img/wiki/toolbar/25_Up.png||[[<span style="color: red;">'''LINK'''</span> /22-0400_Navigating_ChartWindow.html name="1"; ||Moving a Data Series Vertically]] | ||
| + | |-|'''Move Down'''||http://www.multicharts.com/img/wiki/toolbar/26_Down.png||[[<span style="color: red;">'''LINK'''</span> /22-0400_Navigating_ChartWindow.html name="1"; ||Moving a Data Series Vertically]] | ||
| + | |-|'''Scroll Left'''||http://www.multicharts.com/img/wiki/toolbar/27_Left.png||[[<span style="color: red;">'''LINK'''</span> /22-0400_Navigating_ChartWindow.html name="1"; ||Scrolling Horizontally through a Chart]] | ||
| + | |-|'''Scroll Right'''||http://www.multicharts.com/img/wiki/toolbar/28_Right.png||[[<span style="color: red;">'''LINK'''</span> /22-0400_Navigating_ChartWindow.html name="1"; ||Scrolling Horizontally through a Chart]] | ||
| + | |-|'''Increase Weight'''||http://www.multicharts.com/img/wiki/toolbar/29_Thick.png||[[<span style="color: red;">'''LINK'''</span> /22-0203_FCh_ChStyle_General.html name="2"; ||Changing Bar Weight]] | ||
| + | |-|'''Decrease Weight'''||http://www.multicharts.com/img/wiki/toolbar/30_Thin.png||[[<span style="color: red;">'''LINK'''</span> /22-0203_FCh_ChStyle_General.html name="2"; ||Changing Bar Weight]] | ||
| + | |-|'''Zoom In'''||http://www.multicharts.com/img/wiki/toolbar/31_Zoom_In.png||[[<span style="color: red;">'''LINK'''</span> /22-0400_Navigating_ChartWindow.html name="5"; ||Zooming In]] | ||
| + | |-|'''Zoom Out'''||http://www.multicharts.com/img/wiki/toolbar/32_Zoom_Out.png||[[<span style="color: red;">'''LINK'''</span> /22-0400_Navigating_ChartWindow.html name="6"; ||Zooming Out]] | ||
| + | |-|'''Reset Scales'''||http://www.multicharts.com/img/wiki/toolbar/33_Reset_Scales.png||[[<span style="color: red;">'''LINK'''</span> /22-0400_Navigating_ChartWindow.html name="4=41"; ||Resetting Both Scales]] | ||
| + | |-|'''Reset Time Scale'''||http://www.multicharts.com/img/wiki/toolbar/35_Reset_Time_Scale.png||[[<span style="color: red;">'''LINK'''</span> /22-0400_Navigating_ChartWindow.html name="4=42"; ||Resetting Time Scale (Bar Spacing)]] | ||
| + | |-|'''Reset Price Scale'''||http://www.multicharts.com/img/wiki/toolbar/34_Reset_Price_Scale.png||[[<span style="color: red;">'''LINK'''</span> /22-0400_Navigating_ChartWindow.html name="4=43"; ||Resetting Price Scale]] | ||
| + | |-|'''Hide Object'''||http://www.multicharts.com/img/wiki/toolbar/54_Hide.png||[[<span style="color: red;">'''LINK'''</span> /21-0100_MCWorkArea.html name="9"; ||Using Studies]] | ||
| + | |- | ||
| + | |'''Chart Analysis Toolbar'''|| || || | ||
| + | |- | ||
| + | |-|'''Insert Symbol'''||http://www.multicharts.com/img/wiki/toolbar/051_Insert_Symbol.png||[[<span style="color: red;">'''LINK'''</span> /22-0100_CreatingChart.html name="3=31"; ||Inserting Additional Symbols into a Chart Window]] | ||
| + | |-|'''Insert Study'''||http://www.multicharts.com/img/wiki/toolbar/06_Insert_Indicators.png|[[<span style="color: red;">'''LINK'''</span> /0270_Indicators/22-7000_Studies.html name="1=11"; ||Inserting Studies]] | ||
| + | |-|'''Show / Hide Drawing Tools'''||http://www.multicharts.com/img/wiki/toolbar/07_Drawing_Tools.png||[[<span style="color: red;">'''LINK'''</span> /22-6000_DrawingTools.html name="1"; ||Inserting Drawing Tools]] | ||
| + | |-|'''Format Symbol'''||http://www.multicharts.com/img/wiki/toolbar/09_Format_Symbol.png||[[<span style="color: red;">'''LINK'''</span> /22-02021_FCh_SymSet_ChSymbol.html name="2=21"; ||Changing Symbols]] | ||
| + | |-|'''Format Window'''||http://www.multicharts.com/img/wiki/toolbar/10_Format_Window.png||[[<span style="color: red;">'''LINK'''</span> /22-0300_FChWindow_General.html name="2"; ||Chart Appearance]] | ||
| + | |-|'''Bar Chart'''||http://www.multicharts.com/img/wiki/toolbar/11_Bar_Chart.png||[[<span style="color: red;">'''LINK'''</span> /22-02031_FCh_ChStyle_OHLC.html name="2"; ||Setting OHLC Chart Style]] | ||
| + | |-|'''Hollow Candlestick Chart'''||http://www.multicharts.com/img/wiki/toolbar/12_CandleStick_Chart.png||[[<span style="color: red;">'''LINK'''</span> /22-020331_FCh_ChStyle_HLCdlSticks.html name="2"; ||Selecting Hollow Candlestick Chart Style]] | ||
| + | |-|'''Line on Close Chart'''||http://www.multicharts.com/img/wiki/toolbar/13_Line_Chart.png||[[<span style="color: red;">'''LINK'''</span> /22-02035_FCh_ChStyle_LOC.html name="1"; ||Selecting line on Close Chart Style]] | ||
| + | |-|'''Arrow Pointer'''||http://www.multicharts.com/img/wiki/toolbar/15_Arrow_Cursor.png||[[<span style="color: red;">'''LINK'''</span> /22-0410_Pointers.html name="1"; ||Pointer]] | ||
| + | |-|'''Cross Pointer'''||http://www.multicharts.com/img/wiki/toolbar/16_Crosshair_Cursor.png||[[<span style="color: red;">'''LINK'''</span> /22-0410_Pointers.html name="2"; ||Cross Pointer]] | ||
| + | |-|'''Show/Hide Chart Hint'''||http://www.multicharts.com/img/wiki/toolbar/18_Show_Hint.png||[[<span style="color: red;">'''LINK'''</span> /22-0410_Pointers.html name="3=31"; ||Understanding Hint Modes]] | ||
| + | |-|'''Show/Hide Cross'''||http://www.multicharts.com/img/wiki/toolbar/17_Show_Cross.png||[[<span style="color: red;">'''LINK'''</span> /22-0410_Pointers.html name="4"; ||Cross Mode]] | ||
| + | |-|'''Tracking Time and Price'''||http://www.multicharts.com/img/wiki/toolbar/19_Tracking_Time_and_Price.png||[[<span style="color: red;">'''LINK'''</span> /22-0410_Pointers.html name="4"; ||Cross Mode]] | ||
| + | |-|'''Data Window'''||http://www.multicharts.com/img/wiki/toolbar/60_DataWindow.png||[[<span style="color: red;">'''LINK'''</span> /22-0308_DataWindow.html name=""; ||Data Window]] | ||
| + | |- | ||
| + | |-|'''Resolution Toolbar'''|| || || | ||
| + | |- | ||
| + | |-|'''Tick Bar''' ||http://www.multicharts.com/img/wiki/toolbar/compression/02_Tick.png||[[<span style="color: red;">'''LINK'''</span> /22-02022_FCh_SymSet_DataComp.html name="1=11"; ||Understanding Tick-Based Charts]] | ||
| + | |-|'''Volume Bar'''||http://www.multicharts.com/img/wiki/toolbar/compression/03_VolumeBar.png||[[<span style="color: red;">'''LINK'''</span> /22-02022_FCh_SymSet_DataComp.html name="4=41"; ||Understanding Volume-Based Charts]] | ||
| + | |-|'''Range Bar''' ||http://www.multicharts.com/img/wiki/toolbar/compression/04_RangeBar.png||[[<span style="color: red;">'''LINK'''</span> /22-02022_FCh_SymSet_DataComp.html name="3=31"; ||Understanding Range-Based Charts]] | ||
| + | |-|'''Second Bar'''||http://www.multicharts.com/img/wiki/toolbar/compression/05_Second.png||[[<span style="color: red;">'''LINK'''</span> /22-02022_FCh_SymSet_DataComp.html name="2=21"; ||Setting Resolution of Time-Based Charts]] | ||
| + | |-|'''Minute Bar'''||http://www.multicharts.com/img/wiki/toolbar/compression/06_Minute.png||[[<span style="color: red;">'''LINK'''</span> /22-02022_FCh_SymSet_DataComp.html name="2=21"; ||Setting Resolution of Time-Based Charts]] | ||
| + | |-|'''Hourly Bar'''||http://www.multicharts.com/img/wiki/toolbar/compression/08_1-Hour.png||[[<span style="color: red;">'''LINK'''</span> /22-02022_FCh_SymSet_DataComp.html name="2=21"; ||Setting Resolution of Time-Based Charts]] | ||
| + | |-|'''Daily Bar''' ||http://www.multicharts.com/img/wiki/toolbar/compression/09_1-Day.png||[[<span style="color: red;">'''LINK'''</span> /22-02022_FCh_SymSet_DataComp.html name="2=21"; ||Setting Resolution of Time-Based Charts]] | ||
| + | |-|'''Weekly Bar'''||http://www.multicharts.com/img/wiki/toolbar/compression/10_1-Week.png||[[<span style="color: red;">'''LINK'''</span> /22-02022_FCh_SymSet_DataComp.html name="2=21"; ||Setting Resolution of Time-Based Charts]] | ||
| + | |-|'''Monthly Bar'''||http://www.multicharts.com/img/wiki/toolbar/compression/101_1-Month.png||[[<span style="color: red;">'''LINK'''</span> /22-02022_FCh_SymSet_DataComp.html name="2=21"; ||Setting Resolution of Time-Based Charts]] | ||
| + | |-|'''Quarterly Bar'''||http://www.multicharts.com/img/wiki/toolbar/compression/11_1-Quarter.png||[[<span style="color: red;">'''LINK'''</span> /22-02022_FCh_SymSet_DataComp.html name="2=21"; ||Setting Resolution of Time-Based Chartse]] | ||
| + | |-|'''Yearly Bar'''||http://www.multicharts.com/img/wiki/toolbar/compression/12_1-Year.png||[[<span style="color: red;">'''LINK'''</span> /22-02022_FCh_SymSet_DataComp.html name="2=21"; ||Setting Resolution of Time-Based Charts]] | ||
| + | |- | ||
| + | |Drawing Toolbar'''|| || || | ||
| + | |- | ||
| + | |-|'''Trend Line'''||http://www.multicharts.com/img/wiki/toolbar/36_Trend_Line.png|||[[<span style="color: red;">'''LINK'''</span> /0260_Drawings/0260-01_TrendLine.html name="1"; ||Inserting Trend Line]] | ||
| + | |-|'''Horizontal Line'''||http://www.multicharts.com/img/wiki/toolbar/37_Horizontal_Line.png||[[<span style="color: red;">'''LINK'''</span> /0260_Drawings/0260-02_HorizLine.html name="1"; ||Inserting Horizontal Line]] | ||
| + | |-|'''Time Line'''||http://www.multicharts.com/img/wiki/toolbar/38_Time_Line.png||[[<span style="color: red;">'''LINK'''</span> /0260_Drawings/0260-03_TimeLine.html name="1"; ||Inserting Time Line]] | ||
| + | |-|'''Regression Channel'''||http://www.multicharts.com/img/wiki/toolbar/39_Regression_Channel.png||[[<span style="color: red;">'''LINK'''</span> /0260_Drawings/0260-04_RegressionChannel.html name="1"; ||Inserting Regression Channel]] | ||
| + | |-|'''Equidistant Channel'''||http://www.multicharts.com/img/wiki/toolbar/40_Equidistant_Channel.png||[[<span style="color: red;">'''LINK'''</span> /0260_Drawings/0260-05_EquidistantChannel.html name="1"; ||Inserting Equidistant Channel]] | ||
| + | |-|'''Andrews' Pitchfork'''||http://www.multicharts.com/img/wiki/toolbar/41_Andrews_Pitchfork.png||[[<span style="color: red;">'''LINK'''</span> /0260_Drawings/0260-06_AndrewsPitchfork.html name="1"; ||Inserting Andrews' Pitchfork]] | ||
| + | |-|'''Fibonacci Retracement Price Lines'''||http://www.multicharts.com/img/wiki/toolbar/42_Fibonacci_Retracement_Price_Lines.png||[[<span style="color: red;">'''LINK'''</span> /0260_Drawings/0260-07_FibRetracePriceLines.html name="1"; ||Inserting Fibonacci Retracement Price Lines]] | ||
| + | |-|'''Fibonacci Speed/Resistance Fan'''||http://www.multicharts.com/img/wiki/toolbar/43_Fibonacci_Speed_Resistance_Fan.png||[[<span style="color: red;">'''LINK'''</span> /0260_Drawings/0260-08_FibSpeedResFan.html name="1"; ||Inserting Fibonacci Speed/Resistance Fan]] | ||
| + | |-|'''Fibonacci Speed/Resistance Arcs'''||http://www.multicharts.com/img/wiki/toolbar/44_Fibonacci_Speed_Resistance_Arcs.png||[[<span style="color: red;">'''LINK'''</span> /0260_Drawings/0260-09_FibSpeedResArcs.html name="1"; ||Inserting Fibonacci Speed/Resistance Arcs]] | ||
| + | |-|'''Fibonacci Time Zones'''||http://www.multicharts.com/img/wiki/toolbar/45_Fibonacci_Time_Zones.png||[[<span style="color: red;">'''LINK'''</span> /0260_Drawings/0260-10_FibTimeZones.html name="1"; ||Inserting Fibonacci Time Zones]] | ||
| + | |-|'''Fibonacci Trend-Based Time Lines'''||http://www.multicharts.com/img/wiki/toolbar/46_Fibonacci_Trend-based_Time_Lines.png||[[<span style="color: red;">'''LINK'''</span> /0260_Drawings/0260-11_FibTrend-BasedTimeLines.html name="1"; ||Inserting Fibonacci Trend-Based Time Lines]] | ||
| + | |-|'''Gann Fan'''||http://www.multicharts.com/img/wiki/toolbar/47_Gann_Fan.png||[[<span style="color: red;">'''LINK'''</span> /0260_Drawings/0260-12_GannFan.html name="1"; ||Inserting Gann Fan]] | ||
| + | |-|'''Gann Square'''||http://www.multicharts.com/img/wiki/toolbar/48_Gann_Square.png||[[<span style="color: red;">'''LINK'''</span> /0260_Drawings/0260-13_GannSquare.html name="1"; ||Inserting Gann Square]] | ||
| + | |-|'''Retracement Calculator'''||http://www.multicharts.com/img/wiki/toolbar/49_Retracement_Calculator.png||[[<span style="color: red;">'''LINK'''</span> /0260_Drawings/0260-14_RetracementCalc.html name="1"; ||Inserting Retracement Calculator]] | ||
| + | |-|'''Text'''||http://www.multicharts.com/img/wiki/toolbar/50_Text.png||[[<span style="color: red;">'''LINK'''</span> /0260_Drawings/0260-15_Text.html name="1"; ||Inserting Text]] | ||
| + | |-|'''Rectangle'''||http://www.multicharts.com/img/wiki/toolbar/51_Rectangle.png||[[<span style="color: red;">'''LINK'''</span> /0260_Drawings/0260-16_Rectangle.html name="1"; ||Inserting Rectangle]] | ||
| + | |-|'''Ellipse'''||http://www.multicharts.com/img/wiki/toolbar/52_Ellipse.png||[[<span style="color: red;">'''LINK'''</span> /0260_Drawings/0260-17_Ellipse.html name="1"; ||Inserting Ellipse]] | ||
| + | |-|'''Arc'''||http://www.multicharts.com/img/wiki/toolbar/53_Arc.png||[[<span style="color: red;">'''LINK'''</span> /0260_Drawings/0260-18_Arc.html name="1"; ||Inserting Arc]] | ||
| + | |-|'''Arrow Down'''||http://www.multicharts.com/img/wiki/toolbar/531_ArrowDown.png||[[<span style="color: red;">'''LINK'''</span> /0260_Drawings/0260-19_ArrowDown.html name="1"; ||Inserting Arrow Down]] | ||
| + | |-|'''Arrow Up'''||http://www.multicharts.com/img/wiki/toolbar/532_ArrowUp.png||[[<span style="color: red;">'''LINK'''</span> /0260_Drawings/0260-20_ArrowUp.html name="1"; ||Inserting Arrow Up]] | ||
| + | |- | ||
| + | |-|'''Command Line Toolbar'''|| || || | ||
| + | |- | ||
| + | |-|'''Resolution'''||http://www.multicharts.com/img/wiki/toolbar/compression/01_Resolution.png | ||
| + | |Click the '''Resolution''' icon to hide or redisplay the Resolution Toolbar. | ||
| + | <br>[[<span style="color: red;">'''LINK'''</span> /22-02022_FCh_SymSet_DataComp.html name="2=21"; ||Setting Resolution of Time-Based Charts]] | ||
| + | |-|'''Command Line'''<td class="QMtd"> </td>|[[<span style="color: red;">'''LINK'''</span> /21-0100_MCWorkArea.html name="3=35"; ||Understanding Command Line]] | ||
| + | |} | ||
| + | |||
| + | === Understanding Command Line === | ||
| + | '''Command Line''' | ||
| + | |||
| + | Command Line toolbar allows the active window's chart resolution or symbol to be changed simply by entering a text command. | ||
| + | |||
| + | Type the appropriate command in the '''Command Line''' http://www.multicharts.com/img/wiki/toolbar/052_CommandLine.png" WIDTH="209" HEIGHT="56" HSPACE="2"ALIGN="bottom"> combo box and press '''Enter'''. | ||
| + | |||
| + | To select a previously used command use the drop-down function. | ||
| + | |||
| + | <br><div style="background-color: #E5F6FF;">'''Examples:'''</div> | ||
| + | Type in: "'''5 minutes'''" to change the chart resolution to 5 minutes. | ||
| + | |||
| + | Type in: "'''AMD'''" to change the symbol to AMD.</div> | ||
| + | |||
| + | === Customizing Toolbars === | ||
| + | With Custom Toolbars, the user can not only choose which toolbar to display, but also which buttons appear on the toolbar. Adding more toolbars and buttons makes it easier to access certain functions. Consolidating the most frequently used buttons onto one toolbar saves space and permits a larger display area in the workspace. | ||
| + | |||
| + | To customize the toolbars, | ||
| + | |||
| + | # Select '''View''' from the main menu, then select '''Toolbars''' and '''Customize'''. The '''Customize''' window will appear. | ||
| + | # In the '''Toolbars''' pane, select the type of toolbar to customize. Check the selected toolbar’s check box to display the toolbar. Uncheck the selected toolbar to remove the toolbar. | ||
| + | # In the '''Commands''' pane, select which buttons will appear on the toolbar. | ||
| + | # Select the '''Close''' button. | ||
[[Category:MultiCharts]] | [[Category:MultiCharts]] | ||
Revision as of 19:49, 25 January 2012
The application window consists of Toolbars, Workspaces, and Windows (Chart or/and Scanner).
For detailed information about Windows, [[LINK /21-0100_MCWorkArea.html name="2"; ||click here]].
Contents
Understanding Workspaces
Workspaces help manage the working process. Several Workspaces can be open at the same time. It is possible to create, save, open, close, rename, and delete Workspaces, as well as to switch between Workspaces that are open in the application window. Each Workspace can contain multiple windows.
Names of all open Workspaces are shown in the tabs at the bottom of application window. The tab of the currently selected (active) Workspace is highlighted. To switch to another open Workspace click the tab of the Workspace you wish to switch to.
To achieve peak performance limit the number of simultaneously open workspaces to the ones you actually need.
Creating Workspaces
To create a new Workspace, click the New Workspace  " WIDTH="23" HEIGHT="20" HSPACE="2"ALIGN="bottom"> icon on the Main toolbar.
Workspaces can also be created by using the Ctrl + N hot key, or by selecting File in the main menu, then pointing to New and clicking New Workspace.
Saving Workspaces
A Workspace, complete with Chart/Scanner Windows and all settings, is saved as a file with .wsp extension.
To save a Workspace, click the Save Workspace  " WIDTH="23" HEIGHT="20" HSPACE="2"ALIGN="bottom"> icon on the Main toolbar.
Workspaces can also be saved by using the Ctrl + S hot key, or by selecting File in the main menu and clicking Save Workspace.
" WIDTH="23" HEIGHT="20" HSPACE="2"ALIGN="bottom"> icon on the Main toolbar.
Workspaces can also be saved by using the Ctrl + S hot key, or by selecting File in the main menu and clicking Save Workspace.
If the Workspace has not yet been named, the Save As dialog box will appear, allowing to choose a file name for the workspace.
In order to save an already named Workspace under a new name, select File in the main menu and click Save Workspace As.
To save Workspaces automatically on application exit, see [[LINK /21-0100_MCWorkArea.html name="1=17"; ||Workspaces Preferences]].
Opening Workspaces
Saved Workspaces can be opened by using Windows Explorer/File manager as well as from the application.
To open a Workspace from the application, click the Open Workspace  " WIDTH="23" HEIGHT="20" HSPACE="2"ALIGN="bottom"> icon on the Main toolbar; in the Open dialog box that appears, navigate to and select the Workspace file (.wsp extension) and click the Open button.
Workspaces can also be opened by using the Ctrl + O hot key, or by selecting File in the main menu and clicking Open Workspace.
" WIDTH="23" HEIGHT="20" HSPACE="2"ALIGN="bottom"> icon on the Main toolbar; in the Open dialog box that appears, navigate to and select the Workspace file (.wsp extension) and click the Open button.
Workspaces can also be opened by using the Ctrl + O hot key, or by selecting File in the main menu and clicking Open Workspace.
Recently used Workspaces can be opened by clicking the down-arrow to the right of the Open Workspace " WIDTH="23" HEIGHT="20" HSPACE="2"ALIGN="bottom"> icon on the Main toolbar and then clicking a Workspace name, or by selecting File in the main menu, then pointing to Recent Workspaces and
clicking a Workspace name.
To open Workspaces automatically on application startup, see [[LINK /21-0100_MCWorkArea.html name="1=17"; ||Workspaces Preferences]].
Closing Workspaces
To close a Workspace, click the Close Workspace  " WIDTH="23" HEIGHT="20" HSPACE="2"ALIGN="bottom"> icon on the Main toolbar.
Workspaces can also be closed by using the F4 key, or by selecting File in the main menu and clicking Close Workspace.
" WIDTH="23" HEIGHT="20" HSPACE="2"ALIGN="bottom"> icon on the Main toolbar.
Workspaces can also be closed by using the F4 key, or by selecting File in the main menu and clicking Close Workspace.
If any changes have been made to a Workspace since it was last saved, and: Do not show "Save Workspace" dialog on Exit checkbox
  in [[LINK /21-0100_MCWorkArea.html name="1=17";  ||Workspace
  Preferences]] is not selected, the Save Workspace dialog box will appear:
- click Yes to save the changes and close the Workspace;
- click No to discard the changes and close the Workspace;
- click Cancel to cancel the operation and keep the Workspace open.
To disable the dialog box and close workspaces without confirmation, see [[LINK /21-0100_MCWorkArea.html name="1=17"; ||Workspaces Preferences]].
If both the Do not show "Save Workspace" dialog on Exit checkbox
and Do not save workspaces option are selected in the [[LINK /21-0100_MCWorkArea.html name="1=17"; ||Workspace]] tab
of the Preferences window then no changes to the workspace will be saved on exit!
Renaming Workspaces
Workspaces can be renamed by two different methods:
- Save a copy of the Workspace under a different name. See [[LINK /21-0100_MCWorkArea.html name="1=12"; ||Saving Workspaces]]; or:
- Use Windows Explorer or another program to rename a Workspace file as any other Windows file.
Deleting Workspaces
Use Windows Explorer or another program to delete the Workspace file as you would any other Windows file. Deleting a Workspace does not delete the data or the studies.
Workspaces Preferences
Workspaces preferences settings determine which workspaces, if any, will be opened on application startup, whether changes to workspaces will be saved on application exit, and if a confirmation prompt will appear when Chart/Scanner Windows are closed.
To set workspace preferences:
- Open the Preferences window by selecting File in the main menu and then clicking Preferences; the window can also be opened by using ALT+F, ALT+F keyboard shortcut sequence.
- Select the Workspaces tab.
- To open Workspaces on startup, select the Open Workspaces on Start checkbox; clear the checkbox to not open any Workspaces on startup.
- To show the Workspaces dialog box on startup, select the Show the dialog checkbox; clear the checkbox to not display the dialog box.
- Select the Workspaces to be opened on startup.
- To show Save Workspace dialog box on exit, clear the Do not show "Save Workspace" dialog on Exit checkbox; select the checkbox to not display the dialog box.
- Select Save workspaces or Do not save workspaces to save or not to save the workspaces on exit, respectively.
- To prompt for a confirmation when a Chart/Scanner Window is closed (deleted), clear the Do not prompt for confirmation when I want to close a window checkbox; check the checkbox to prompt for a confirmation when a window is closed.
Understanding Windows (Chart/Scanner)
Chart Windows contain charts, studies, and drawings. The number of windows that can be added to Workspaces is limited only by your computer's hardware configuration.
In Workspaces with multiple windows only one window at a time is active. The active window is the window to which any changes will be applied, and is distinguished by the color of its title bar. Any one of the windows in a Workspace can be selected as the active at any time.
Windows can be moved within a workspace or detached and positioned anywhere on your computer’s desktop, arranged in any order, resized, maximized, minimized, and closed. Closing a window deletes it from the Workspace.
Windows are saved only as a part of the Workspace that contains them.
Creating Windows
A Chart Window is always created at the same time as the chart/grid that is placed in it. It is not possible to create an empty window, without a chart/grid. A Chart/Scanner Window is always created in the currently selected Workspace.
To read more about creating charts [[LINK /22-0100_CreatingChart.html name=""; ||click here]]
To read more about Workspaces [[LINK /21-0100_MCWorkArea.html name="1"; ||click here]]
Selecting a Window as Active
Before making changes to a Window you should make sure that it is active. Only one window at a time can be active.
A Window can be selected as active by one of the following methods:
- Click anywhere on the window to make it active; or:
- Select Window in the main menu and click the name of the window.
Color change of the window's title bar will indicate that the window has become active.
Detaching and Attaching Windows
By default, Windows are displayed within a Workspace. Windows can be detached from a Workspace and positioned anywhere on your computer's desktop; on a multiple-monitor system, one or more Windows can be displayed on each monitor.
A Window can be detached by one of the following methods:
- Click the Detach Window
 " WIDTH="35" HEIGHT="17" HSPACE="2" ALIGN="bottom"> button
on the title bar of the window;
or:
- Select Window in the main menu and click Detach Window.
A Window can be attached back to the Workspace by one of the following methods:
- Click the Attach Window
 " WIDTH="35" HEIGHT="17" HSPACE="2" ALIGN="bottom"> button
on the title bar of the window;
or:
- Select Window in the main menu and click Attach Window.
Detached Windows "Always on Top" Feature
To keep a detached Window displayed always on top of other windows click
the Stick  " WIDTH="35" HEIGHT="17" HSPACE="2" ALIGN="bottom"> button
on the title bar of the window; the button will change
to
" WIDTH="35" HEIGHT="17" HSPACE="2" ALIGN="bottom"> button
on the title bar of the window; the button will change
to  " WIDTH="35" HEIGHT="17" HSPACE="2" ALIGN="bottom">.
To cancel the feature click
the Unstick " WIDTH="35" HEIGHT="17" HSPACE="2" ALIGN="bottom"> button
again; the button will change to " WIDTH="35" HEIGHT="17" HSPACE="2" ALIGN="bottom">.
Arranging Windows
It is possible to arrange windows in any order. A Window can be positioned anywhere by placing the mouse pointer over the window’s title bar, holding the left mouse button, and dragging the window to the desired position.
Windows within a workspace can also be arranged automatically:
- To arrange all open windows for convenient viewing select Window in the main menu and click Arrange All any minimized windows will be placed at the bottom of the Workspace, below any open windows.
- To arrange all windows horizontally or vertically select Window in the main menu and click Arrange Horizontally or Arrange Vertically, respectively.
- To arrange all open windows in a cascade select Window in the main menu and click Cascade; any minimized windows will be placed at the bottom of the Workspace, below any open windows.
Deleting Windows
A window can be deleted from a Workspace. To close a Window means to delete it. It is possible to delete all of the windows from a Workspace, leaving the Workspace empty.
To delete a Window from a Workspace click the Close button on the title bar of the window; in the dialog box that appears, click Yes to delete the window, or click Cancel to cancel the operation and keep the window open.
To disable the dialog box and delete windows without confirmation, see [[LINK /21-0100_MCWorkArea.html name="1=17"; ||Workspaces Preferences]].
Switching between Windows
Within a Workspace you can switch between the open windows by using the Ctrl + F6 hotkey combination, or by clicking anywhere on the window you wish to switch to.
Copying Windows
The active Chart/Scanner Window can be copied, complete with all settings, data series, and studies, and pasted to any open Workspace.
To copy an active window use one of the following methods:
- Select File in the main menu and click Copy Window; or:
- Use CTRL+SHIFT+C hot key combination.
To paste the copied Window:
- Select File in the main menu and click Paste Window, or:
- Use Ctrl + Shift + V hot key combination.
Understanding Toolbars
Toolbars provide convenient access to commonly used functions. These functions can also be accessed by using the menus, but the toolbars let you do it with just one click.
There are six toolbars: Chart Analysis, Command Line, Control, Drawing, Main, and Resolution. Any of the toolbars can be made floating, allowing them to be positioned anywhere, or hidden if they are not needed.
Hiding and Redisplaying Toolbars
All toolbars are displayed by default.
To hide a toolbar select View in the main menu, then click Toolbars and uncheck the toolbar that is to be hidden.
A floating toolbar can also be hidden by clicking the Close button on the toolbar’s title bar.
To redisplay a toolbar select View in the main menu, then click Toolbars and check the toolbar that is to be displayed.
The Resolution toolbar can also be hidden or redisplayed by clicking the Resolution  " WIDTH="23" HEIGHT="20" HSPACE="2"ALIGN="bottom"> icon.
Floating or Docking Toolbars
By default, toolbars are displayed docked to the top of the application window. Any of the toolbars can be made floating or docked. A floating toolbar has its own title bar and can be positioned anywhere on your computer’s desktop.
Toolbars can be made floating by using one of the following methods:
- Double-click the move handle of a docked toolbar; or:
- Position the mouse pointer over the toolbar's move handle; hold the left mouse button and drag the toolbar to the desired position.
Toolbars can be docked by one of the following methods:
- Double-click the toolbar's title bar. The toolbar will dock along the top border of the application window; or:
- Position the mouse pointer over the title bar of a floating toolbar; hold the left mouse button and drag the toolbar to any of the four borders of the application window. Once the mouse pointer comes close to a border of the window, an outline will indicate where the toolbar will be docked. Releasing the mouse button will dock the toolbar.
Resizing Floating Toolbars
A floating toolbar can be resized the same way as any other window.
Toolbar Icons Reference
| Main Toolbar | |||
| Chart Analysis Toolbar | |||
| Drawing Toolbar | |||
| Click the Resolution icon to hide or redisplay the Resolution Toolbar.
|
Understanding Command Line
Command Line
Command Line toolbar allows the active window's chart resolution or symbol to be changed simply by entering a text command.
Type the appropriate command in the Command Line 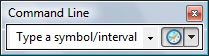 " WIDTH="209" HEIGHT="56" HSPACE="2"ALIGN="bottom"> combo box and press Enter.
To select a previously used command use the drop-down function.
Type in: "5 minutes" to change the chart resolution to 5 minutes.
Type in: "AMD" to change the symbol to AMD.
Customizing Toolbars
With Custom Toolbars, the user can not only choose which toolbar to display, but also which buttons appear on the toolbar. Adding more toolbars and buttons makes it easier to access certain functions. Consolidating the most frequently used buttons onto one toolbar saves space and permits a larger display area in the workspace.
To customize the toolbars,
- Select View from the main menu, then select Toolbars and Customize. The Customize window will appear.
- In the Toolbars pane, select the type of toolbar to customize. Check the selected toolbar’s check box to display the toolbar. Uncheck the selected toolbar to remove the toolbar.
- In the Commands pane, select which buttons will appear on the toolbar.
- Select the Close button.